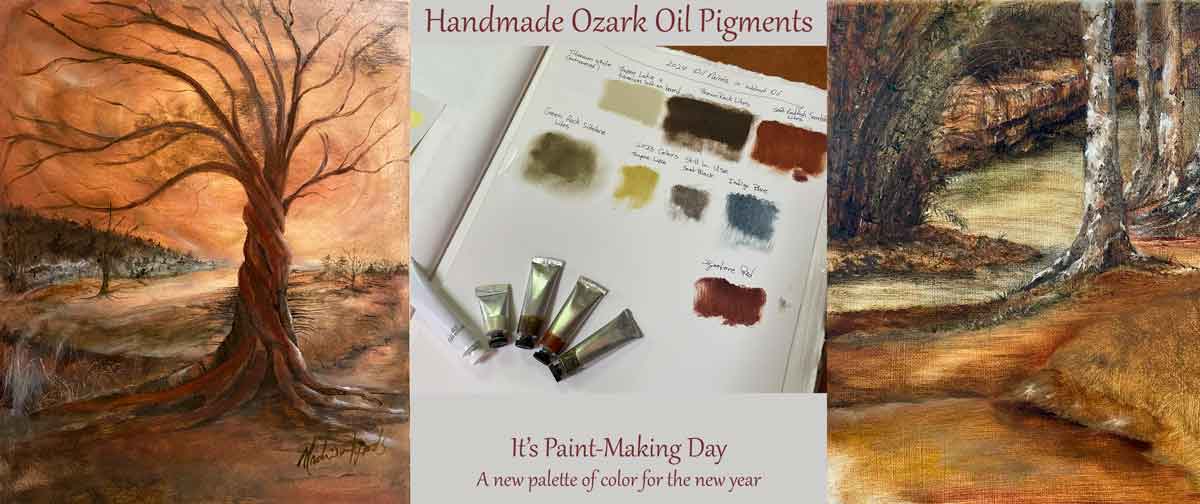
Before I get started on the next art piece, I need to make some tubes of color. So today is oil paint-making day. I’ve already got the rocks crushed and pigments washed, so all I need to do is add the oil, mull on the plate until they’re smooth, and put them in the tubes.

My previous set of tubes lasted a full year. Some of them are empty now, but some of them are getting hard to squeeze out of the tube. They’re very dense, the ones that are hard, but the paint isn’t dry. So I’ll try to find the sweet spot of oily enough and not too oily.
Everything is the same as making watercolor up until the point of adding the binder. For oils, I use linseed oil or walnut. In my first set, I used linseed. For this set, I think I’ll use walnut and see if I can tell the difference when I create something with them.
I’ll try to take pictures of the whole process of my oil paint making and post them here as soon as I can.
… And I’m Done

Yesterday (I’m coming back to this post to update a day late) I made white, light yellow, really brown, earthy red, and greenish siltstone. First, I made the white.
The ‘How To’ for Oil Paint Making
First of all, you’ll need the pigment. You can buy it, or make it from your own local resources. The process of making the pigment is the same for all paints. If using a rock, crush the rock to a powder. Then for a smoother paint, wash the powder and settle out the colored water in a separate jar. I only buy titanium and use local for all of the actual ‘color’. There isn’t anything I’ve found yet locally that makes an opaque white, and I need it for value adjustments.
The Setup and Supplies
You can buy walnut oil specifically for artists, but I’ve been using this one and it is working fine for me. It has no additives at all, and that may be the reason it’s working. Some oils add vit. E to keep the oil from going rancid, but this has none. Walnut oil will go rancid and smell terrible if you don’t keep it refrigerated. You can also use any other drying oil to make your paints. For this set, I wanted to use walnut, but for the first set I used linseed. I also use the walnut oil for thinning my paint, cleaning brushes after painting sessions (I leave them in an inch of fresh oil at the end of each day).


I get the oil from the grocery store, and the tubes from Amazon, usually. I’ll list the supplies I use in my Amazon supply category at shop.wildozark.com when I get a chance. If you use those links, it doesn’t cost anything extra to you but I make a little from being an affiliate. I made a video to show how I get the paint into the tubes after mulling on the marble slab. When I get it edited I’ll upload it to YouTube and put it here, too.


Next up, brown, red, green(ish)
After making the white, I made a light yellow by adding what I had left of my thyme lake pigment to the board before I cleaned off the white leftover. I didn’t have enough of the lake left to make a tube of paint, but enough to get a mixture of the white and yellow for a half a tube full.
And then I made the brown, red, and a greenish color that I get from a siltstone I find in Felkins creek. I forgot to take pics of the greenish, but it’s a sort of green/brown/gray that is close to the color of sage or cedar trees. It’s not as green as the green I get from combining the yellow from thyme and indigo, though.


There were a few colors left from my previous set that are still good, so I kept those (indigo, thyme lake, soot black).

Other posts I’ve made on making paint:
ABOUT
________________________________
Madison Woods is the pen-name for my creative works. I’m a self-taught artist who moved to the Ozarks from south Louisiana in 2005. My paintings of Ozark-inspired scenes feature lightfast pigments from Madison county, Arkansas. My inspiration is nature – the beauty, and the inherent cycle of life and death, destruction, regeneration, and transformation.
Roxann Riedel is my real name. I’m also salesperson for Montgomery Whiteley Realty. If you’re interested in buying or selling in Madison or Carroll county, AR, let me know! You can see the properties that I blog about at WildOzarkLand.com.
Wild Ozark is also the only licensed ginseng nursery in Arkansas. Here’s the link for more information on the nursery
P.S.
There’s always a discount for paintings on the easel 😉
Here’s my Online Portfolio
And, Click here to join my mailing list.
Contact Mad Rox: (479) 409-3429 or madison@madisonwoods and let me know which hat I need to put on 🙂 Madison for art, Roxann for real estate, lol. Or call me Mad Rox and have them both covered!
https://www.youtube.com/@wildozark


